
Shalom Shalom!
It's been a while. I hope you all are well.
I've been telling my Facebook friends as well as ladies in the congregation which we fellowship that I was putting this entry on the blog. Finally, and despite the time (it's 11:15pm EST by the way), I must remain a woman of my word.
So, sauerkraut. Ironically, this was a food that I absolutely HATED as a child. Growing up, we used to eat it at least once a year with "the other white meat" (of which I no longer consume). Perhaps it was because of the texture or just the taste of it in and of itself. Needless to say, I wasn't a fan.
So, why am I doing a blog entry on sauerkraut now? Because I am a new convert. It all started when my Ish said that he wanted to have a vegan Reuben sandwich (yes, vegan. We used seitan instead of corned beef). Well, one of the ingredients on a Reuben sandwich is sauerkraut. I went to our local co-op to pick up the ingredients, and in the refrigerated section, I saw a small jar of locally made, raw sauerkraut. So, I bought it, and took it home for the sandwiches. As I was preparing his sandwiches, in my experience with sauerkraut, I was going to heat it up. However, on the back label, it says to eat it raw--as heating the product would destroy the beneficial bacteria. Once I thought of that--along with videos that I've been seeing on YouTube about sauerkraut being a probiotic, I serve it cold onto his sandwich. Needless to say, he enjoyed his sandwich. When I mentioned my disdain for sauerkraut, he convinced me to try it. I'm so glad of his convincing, because I actually enjoyed it!. I've never had it cold before, and it had a pickled taste to it. As I said earlier...a new convert.
With my newfound love of raw, fermented sauerkraut, when I went back to the co-op, I thought to buy another jar. They didn't have the flavor of the first jar (which was essentially plain, cabbage sauerkraut); rather, they had GARLIC sauerkraut. If you have read other entries of this blog for any given length of time, you would know how much I LOOOOOOVE garlic. So, of course I bought it! Needless to say, loving it was an understatement. I ate the whole 8 oz jar in one sitting. Unfortunately, my Ish wasn't too happy with my breath--as it was late when I ate it, so I had garlic breathe upon going to bed, and my morning breathe (according to him) was worse. Anywho, I absolutely, positively LOVED it, and the fact that I was consuming a product that contains probiotics, that was an even greater draw. There was, however, one slight drawback. Such goodness was a bit on a pricey side--over $7 for an 8 oz jar. So, what did I do, I enrolled into YouTube University to learn how to make it. So, with months of study and trial and error, I now present my way of making sauerkraut. If you were like me, and didn't like sauerkraut as a child, trust me, from one former sauerkraut hater to another future former sauerkraut hater, you too will be converted. Mind you, the process is indeed simple, but there is a waiting time. I assure you, it is indeed worth the wait!

As you can see, plain sauerkraut only contains two ingredients...cabbage and salt. Here we have 3 cabbages and 5 tablespoons of salt. The salt that I use in my house is Himalayan Pink Salt, but you can use just about any natural, real salt. The only salt that would not be recommended is table salt because it has other chemicals (i.e. anti-caking agents) that can inhibit the fermentation process.
The general rule of thumb is 3 tablespoons per 5 lbs of cabbage. I surmise that this will be a little more than 5 pounds once shredded--hence the extra salt. What I will also do (especially when my scale cut off--which happened to me when I made one batch of sauerkraut) is add 2 tablespoons of salt per one head of cabbage. Either way, you'll get sauerkraut in the end.
Also, DO NOT rinse the cabbage. There is already naturally forming bacteria on the cabbage that you'll want in order to get the ball rolling on your fermenting. Rinsing it will adversely affecting your ferment.

These are the outer leave of the cabbage. Remove these--as they will go over the shredded cabbage, and will protect your ferment from unwanted bacteria and mold.

Next, cut in half...

...then in quarters.

After cutting in quarter, cut off the core...

...and cut in shreds.

Once cut in shreds, put in a large bowl. Trust me when I say you'll need a LARGE bowl, because once all shredded the bowl will be completely FILLED!

All three heads of cabbage are now shredded. I told you it would take up the whole bowl!

Next, sprinkle your salt...

...and squeeze, scrunch, and crunch the cabbage through your hand. What this does is equally distribute the salt, and draw out the water from the cabbage. Drawing out the water is what you want to do because it aids in the fermentation process.
Squeeze the cabbage for a few minutes, let it rest, and then come back in about 15-30 minutes and squeeze again. Let sit for about 1 to 1 1/2 hours--so that the water is drawn out of the cabbage.

One hour later, you can see that the volume has decreased. The water has been drawn out of the cabbage, but it still has a crispness to it.

Next, you'll need a container that will hold your ferment. Ideally and traditionally, sauerkraut is made by allowing the contents to ferment in ceramic crock. Since I don't have one (and they are a little pricey. Maybe I'll get one some day), a one gallon jar should suffice.

If you look at the bottom of the bowl, you'll see the water that was drawn out of the cabbage. DO NOT discard it! It is important to use in your ferment!
What you'll do next is take your cabbage...

...and start placing in the jar.

Once an inch or two is in the jar, you'll want to tamp it down in the jar. Traditionally, there is a wooden tamper used to do the same job in a crock. Since I don't have one, my fist will suffice

This is what it looks like with the first tamping.

Then, add more cabbage..

...and with another inch or two, tamp down the cabbage in the jar. Continue to do this until all of the cabbage is in the jar.

And here we are. Surprisingly all three heads fit into the jar. I made one batch where all of the cabbage did not fit in the jar. So, with the extra, I put in a separate glass jar (i.e. a 1 quart Mason jar) and allowed this portion to ferment on its own.

Remember all of that juice from the bottom?

Add that to the jar.

Next, top the shredded cabbage with the outer cabbage leaves that were saved in the beginning.
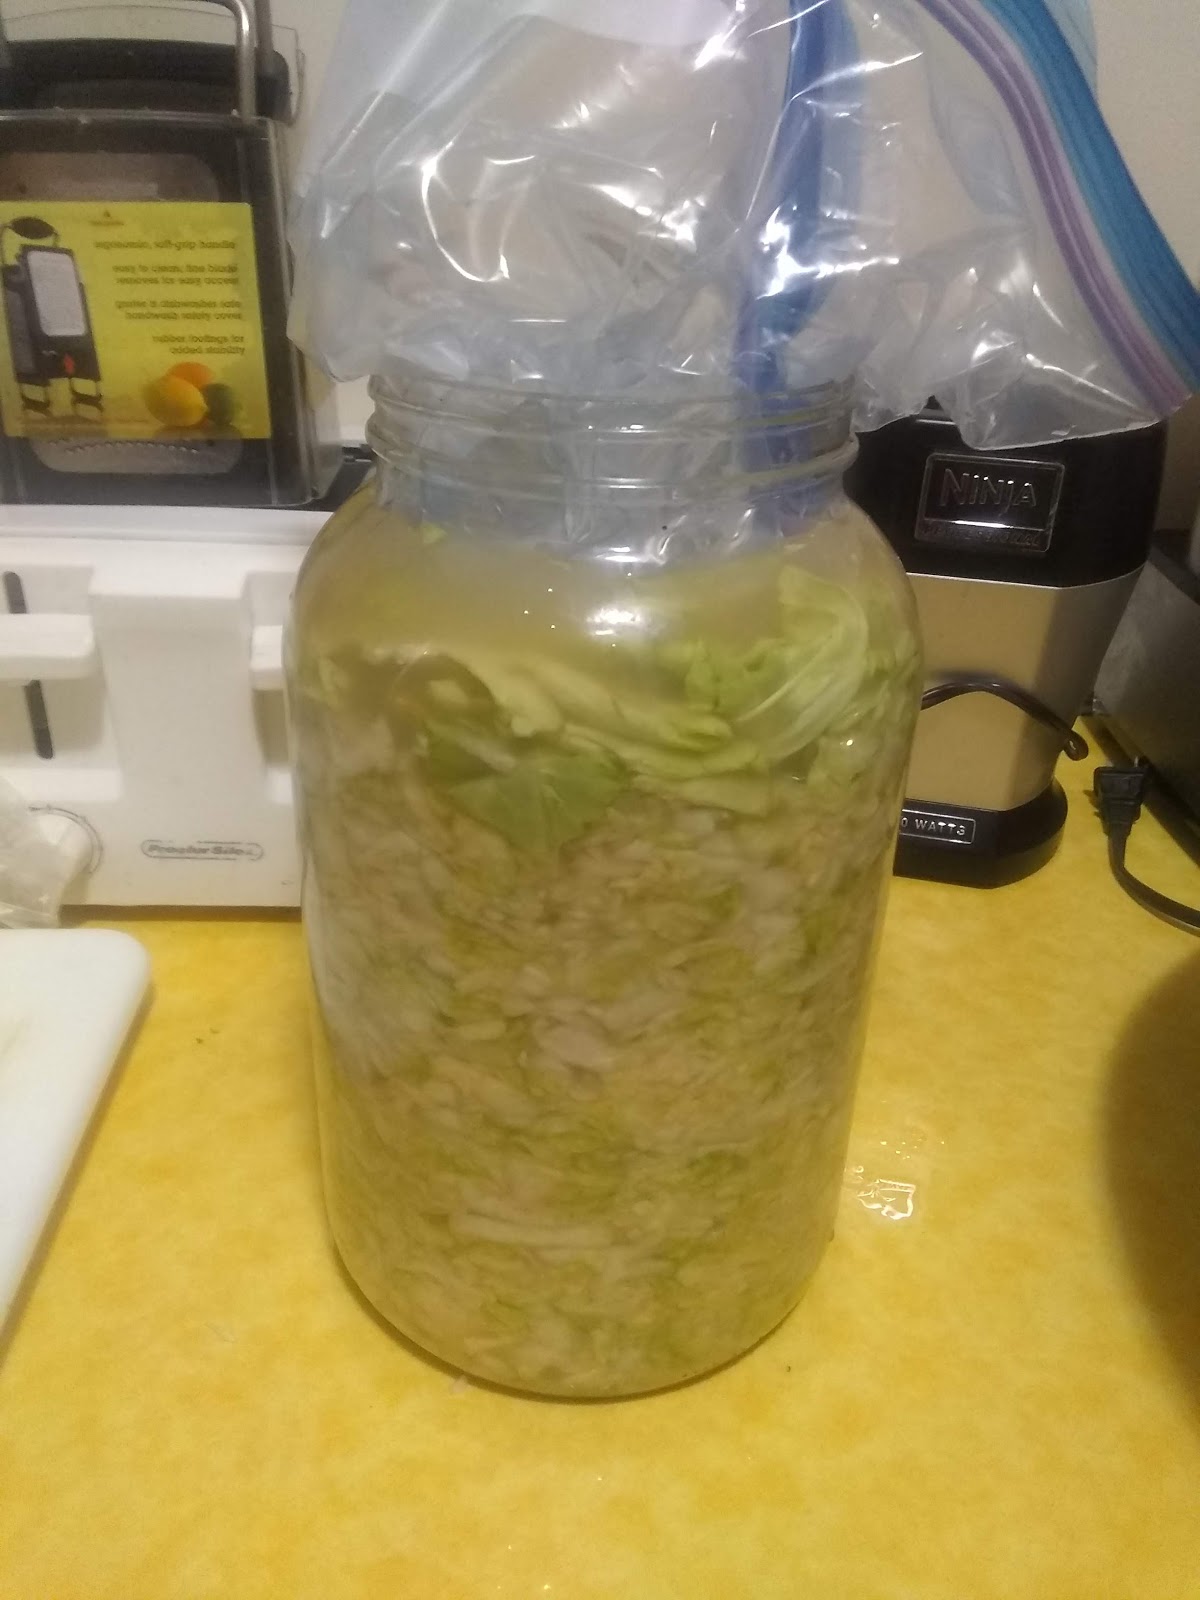
Next, you'll want to add some weight to the top. Traditionally, with the crock are weights. Since sauerkraut is made using an anaerobic process (the absence of air/oxygen), you'll want to keep it weighed down--in order to keep air/oxygen from getting to your ferment. Since I don't have a weight, what I did was simply put water in a Ziploc bag, and then put THAT bag in another bag, and then put that on top of the contents, you'll want to push it in there, and make sure that it is keeping the contents down.

Next, store in a cool, dark place and allow to sit for about 2-3 weeks, checking periodically.

One week in, you can see that the cabbage is no longer that bright green from the beginning. Rather, it's starting to become lighter and more drab in color. That's exactly what you want.
You will also notice some moisture at the bottom of the pan that is holding the jar. This is normal. In this process of fermentation, the bubbles in the fermenting liquid is going to push up, and some liquid is going to come out. This is totally normal. All you can do is make sure you're putting your jar onto (or into) something that will catch that liquid. The jar is in a deep hotel pan (you can get these at any restaurant supply store or, if you have a chef in your family (both my father and stepfather are trained chefs), get some from them). Also, in the process, your weight may either become loosened or removed by the liquid that is pushing up from out of the jar. You might have to replace the "weight" quite often.

Ok. Two weeks in, and I got tired of the "weight" coming off everyday. So, I took another approach. What I did was, once again, replaced the "weight", put another plastic bag (this is a produce bag that you would get from the grocery store), and then affix it with a rubber band. With this, the "weight" did not move, and stayed in place until the ferment was ready.

Three weeks later, and this is what we have....sauerkraut.
Full disclosure. When I went to check it, I noticed some grayish bacteria on the outer leaves (the ones used to protect the actual product). That being said, I removed those leaves, and what you see in the picture was what underneath. Thankfully, the mold didn't get into the product.

The purpose of this picture is to show the bubbles that come up from the liquid. When you stick an implement (ie. fork) in it to press down the contents, to see bubbles coming from the liquid is indicative of a proper ferment.

Homemade, raw, lacto-fermented sauerkraut. I say "lacto-fermented" because of the presence of lactobaccillus bacteria--which is a good bacteria (probiotic) and is good from promoting optimal gut health.
Many people (myself included) would purchase probiotics capsules in order to provide healthy bacteria as a means of maintaining a healthy gut. An interesting study, in that Dr. Joseph Mercola sent some of his homemade sauerkraut to a lab for finding on the probiotics count. The lab result came back to show that 4-6 ounces of homemade fermented vegetable contained about 10 trillion bacteria, and one cup of may contain the equivalent of 8 bottles of probiotics (1). So take 8 bottles of a 30-60 count bottle of probiotics, with 50 billion units of probiotics per bottle, and you do the math. Astounding!

Lastly, I wanted to show my latest batch. This is my version of garlic sauerkraut. Unlike the version as described above, this batch has the addition of 2 whole heads of freshly sliced garlic and about 1-2 tablespoons of caraway seeds. In addition to the probiotic benefits of the sauerkraut, the garlic acts as a prebiotic--which essentially is "food " for probiotics, to keep the probiotics proliferating. So garlic sauerkraut is the ultimate win-win!
The plain version as noted above is for my Ish--who wants his sauerkraut plain, with no frills. The garlic version, on the other hand, is ALL MINE. And lesson learned, I have not eaten it before going to bed...lol.
So again, if you grew up hating sauerkraut, I highly encourage you to start making your own. It made a convert out of me, and I'm sure it will do the same for you. If you do make it, please feel free to leave a comment to let me know how it turned out for you. Also, you don't have to keep it plain or with garlic. You can add other vegetables and fruits (i.e. carrots, apples) to your ferments for more interesting twists and tastes.
Thank you so much for stopping by. So until then...shalom shalom!
Bathshua
No comments:
Post a Comment